1.Important information
Max. panel weight:
120kg with 2 roller carrier
150kg with 3 roller carrier
Glass thicknesses: 8, 10, 12mm
1 = Component
1.;1.1;... = Installation sequence
A = glass width
B = length of track
GE = glass insertion sidelight
GH1= glass height sliding door
GH2= glass height sidelight
H = total height
S = glass width sidelight
t = glass thickness
Glass panels self-cleaning coatings are unsuitable for RS 120 - unless the clamping area (30mm band at the upper glass edge) is left coated.
All glass clamping areas are to be cleaned prior to installation. Only use glass cleaning products, free from
silicones and oil (e.g. acetone).
Precondition for installation of track is an aligned substructure or wall with a max. tolerance of 2mm per
meter.
A maintenance free period of min. 5 years is given with an appropriate handling and normal frequency of approx. 20 cycles per day. An appropriate handling means that the door is always guided by hand when moved.
For higher frequency we would recommend a maintenance contract between fitter and user for a yearly inspection.
2. Requisite tool
3. Scope of delivery
1 . . . . . . 1x track profile
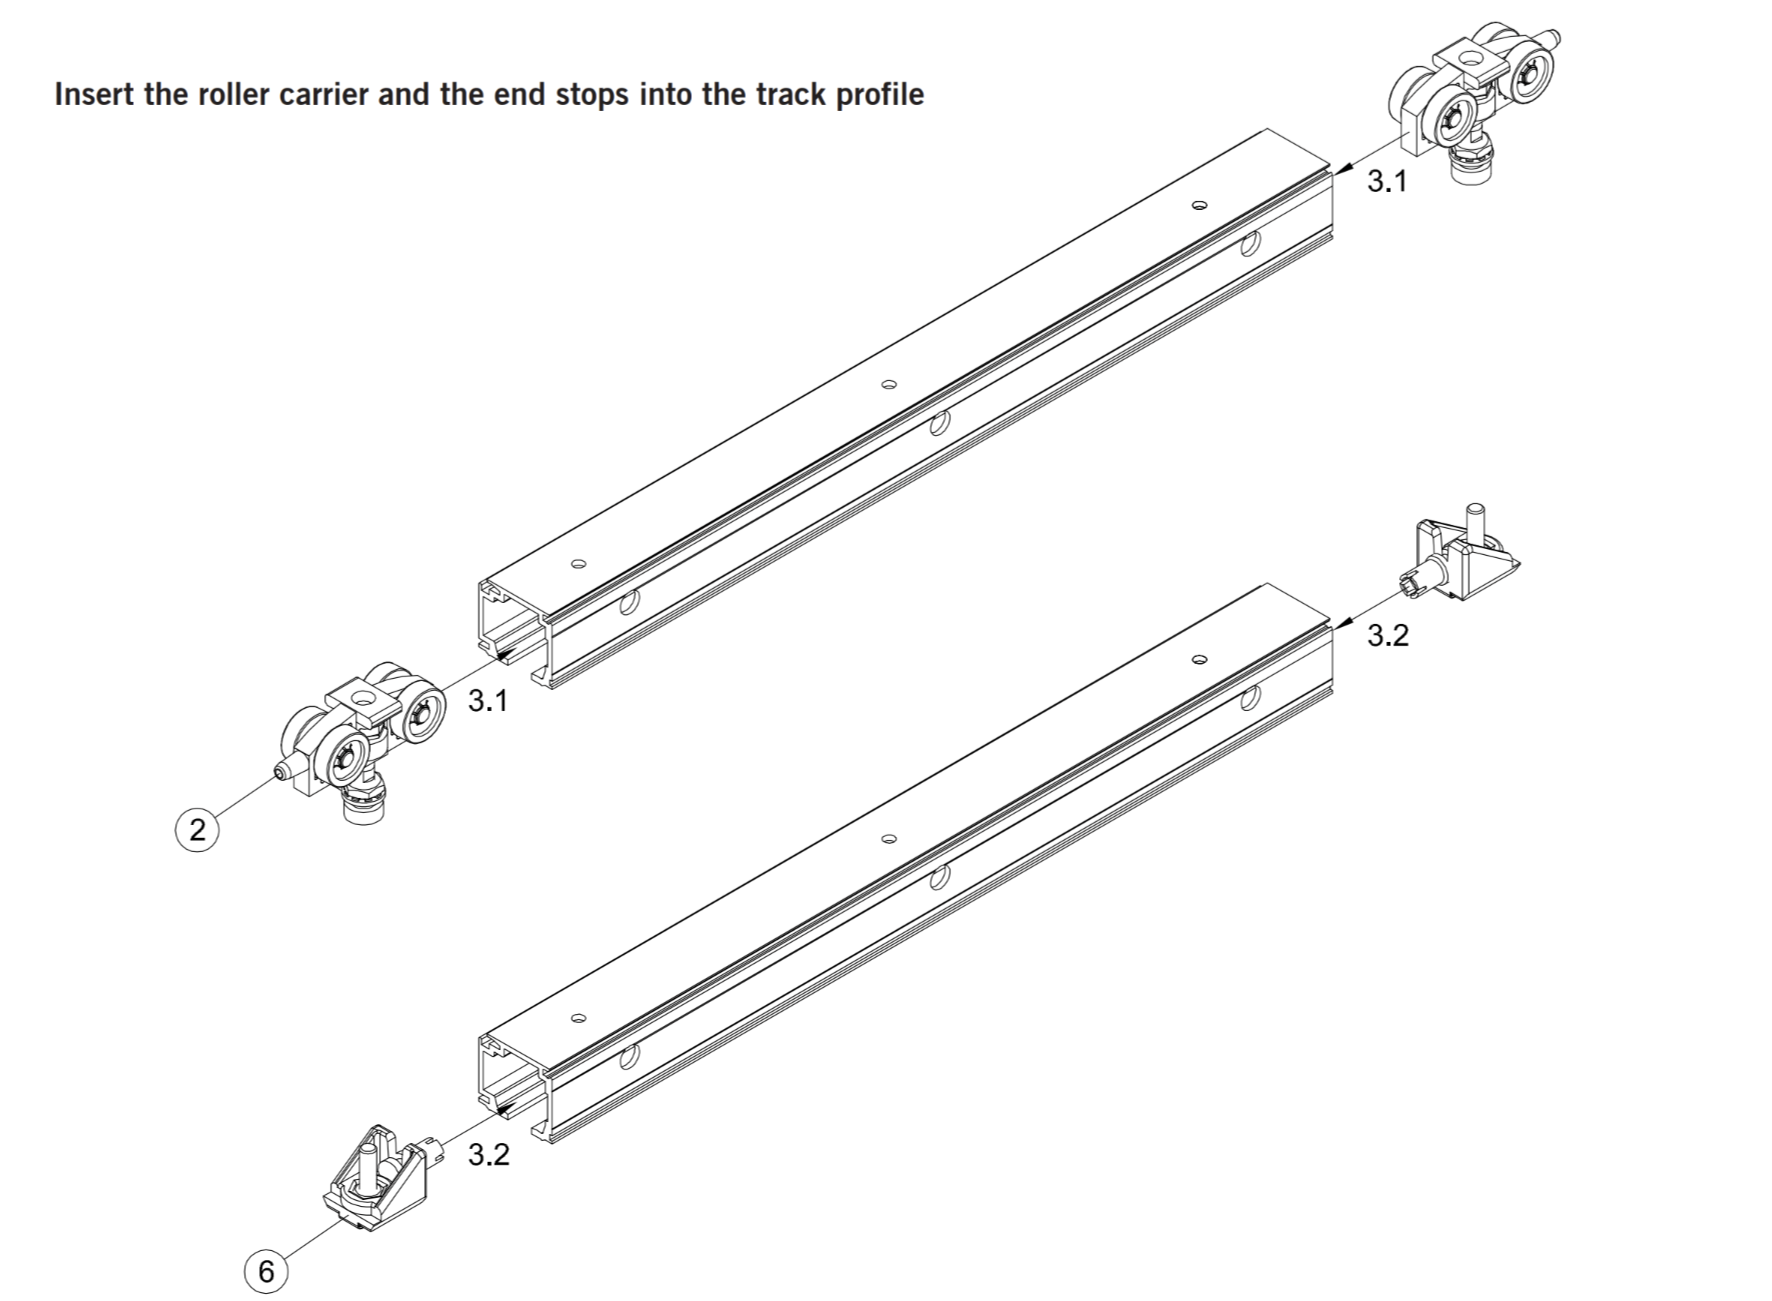
2 . . . . . . 2x carrier
3 . . . . . . 2x clamp patch
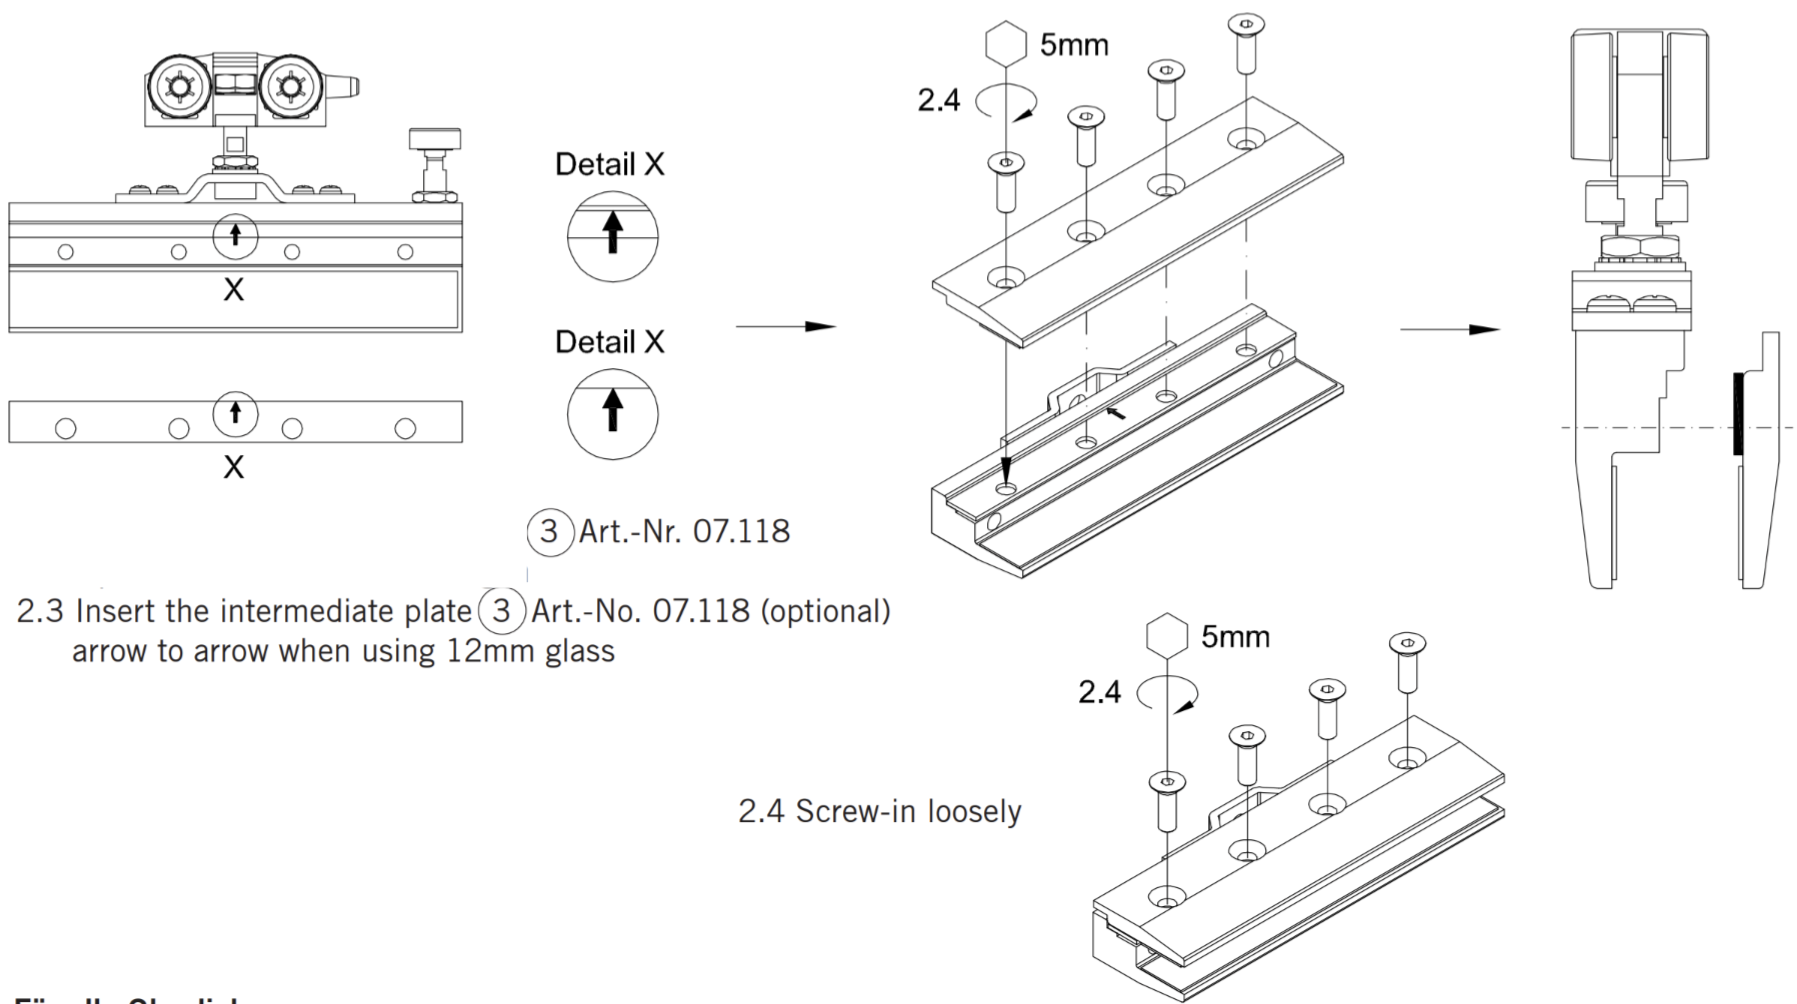
4 . . . . . . 2x intermediate plate, aluminum, for 12mm glass Art.-No.: 07.118 (optional)
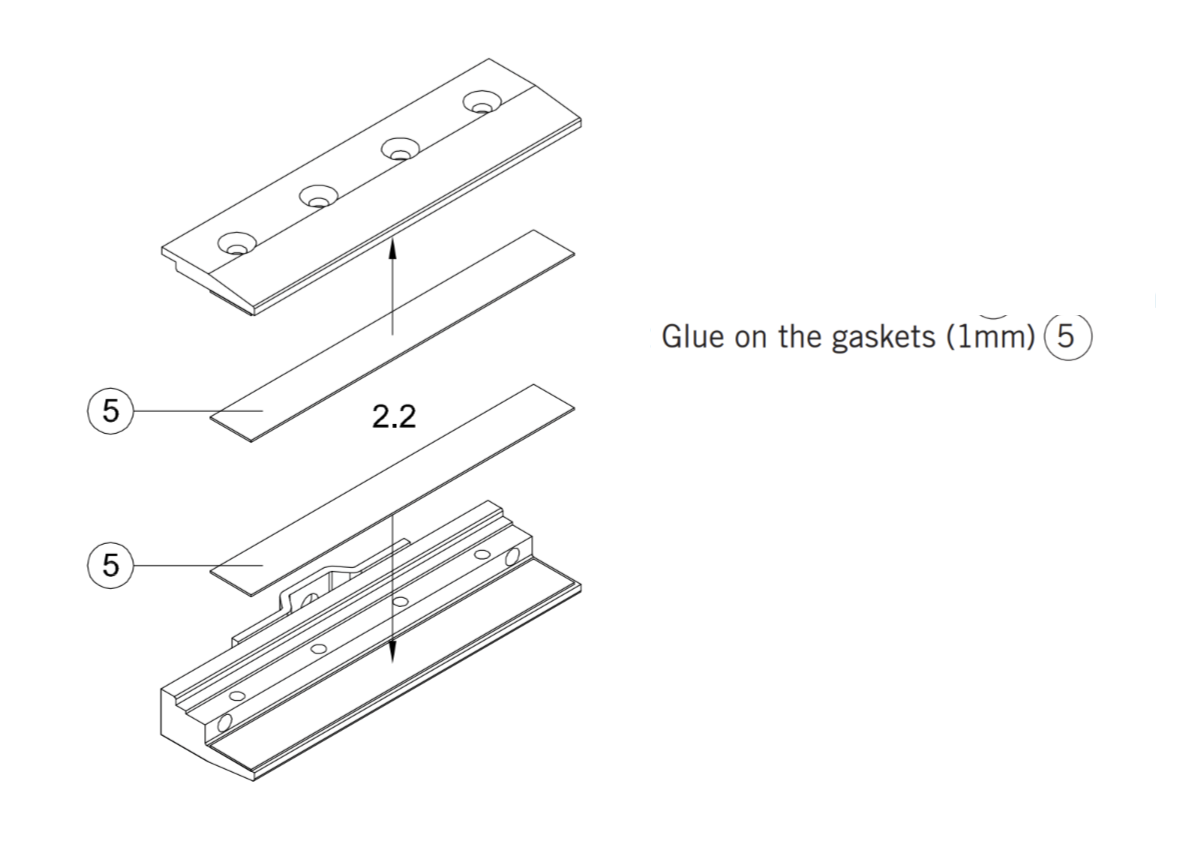
5 . . . . . . 4x gaskets (1mm) for 8mm glass
6 . . . . . . 2x end stops with safety catch
7 . . . . . . 1x floor guide
4. Preparation of clamping patches
Pre-assembled for 10mm glass!
5. Installation of clamping patches
All glass clamping areas are to be cleaned prior to installation. Only use glass cleaning products, free from silicones and oil (e.g. acetone).
With 8mm glass thickness
With 12mm glass thickness
Intermediate plates for 12mm glass have to be ordered seperately!
For all glass thicknesses
single door
double door
Attention: For sliding doors moving in opposite directions, we recommend to use the spacer Art. No.:
29.420, to get the best possible glass protection
6. Insert the roller carrier and the end stops into the track profile
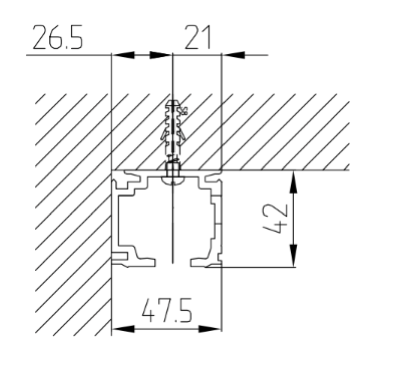
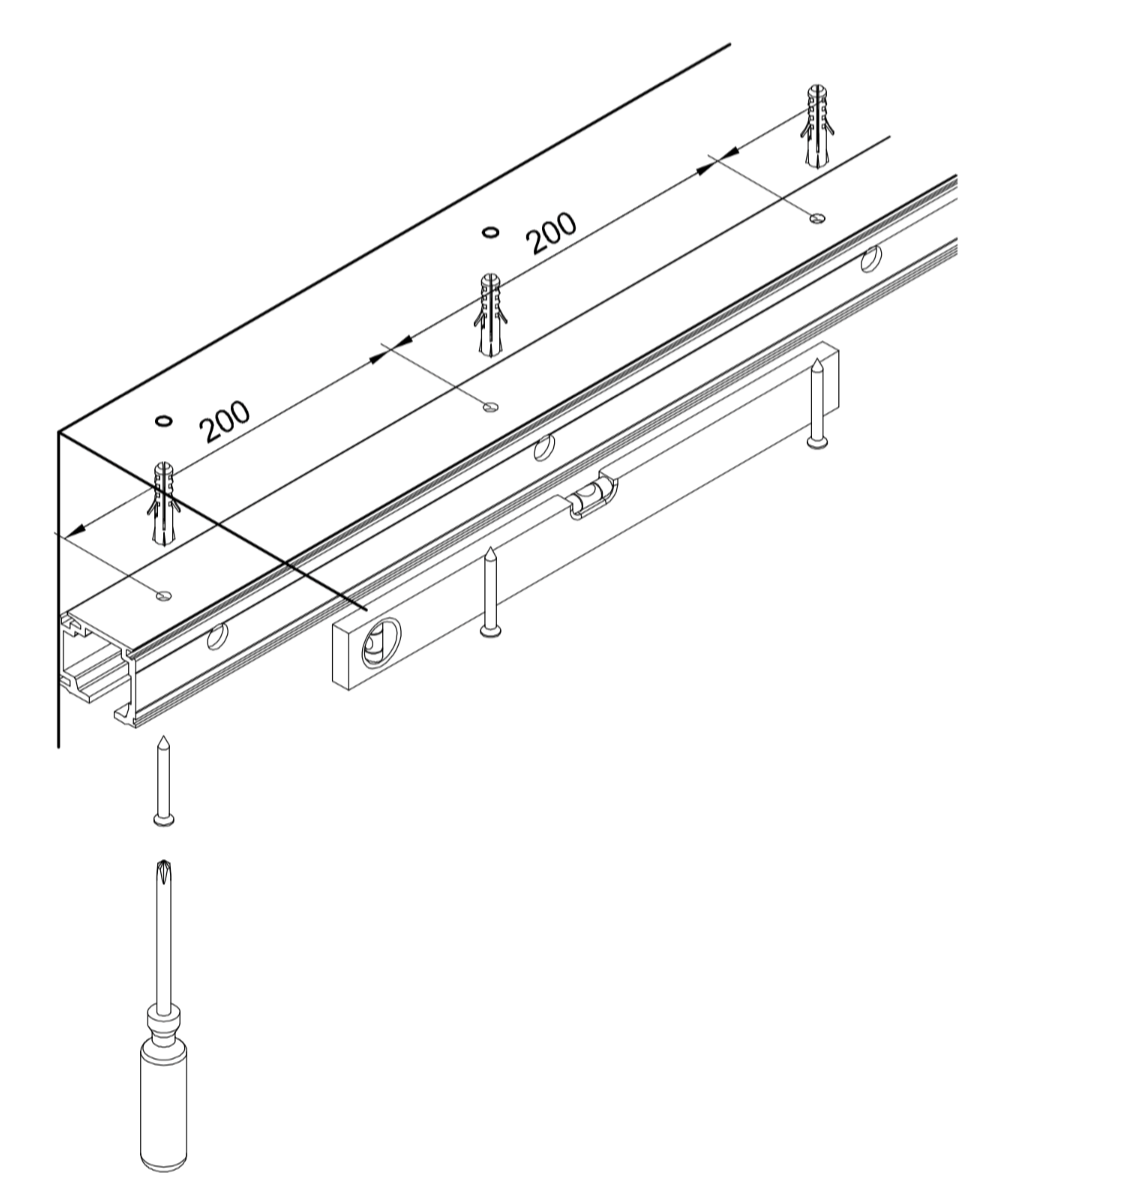
7. Installation of track profile
Delivered screws and plugs are not usable for all types of foundation. Please use suitable fixing material according to foundation!
Installation to ceiling
Installation to wall
8. Installation of floor guide
Delivered screws and plugs are not usable for all types of foundation.Please use suitable fixing material according to foundation!
Adjust the floor guide to required glass thickness
9. Fitting of the sliding door
- Place door onto 10mm blocks and into the floor guide. Fit the door
10. Height adjustment
11. Adjustment of end stops
To avoid a collision with wall or door handle, adjust the end stops with safety catch as required!
12. Adjustment of support screw
13. Installation of sidelight profile (optional)
14. Drill assembly holes and cut thread for M6 screw
Remove sawdust!
15. Installation of sidelight profile (optional) (continuation)
16. Installation of cover profile
sliding door
sliding door with sidelight
17. Installation of end cap (optional)
18. Glass edge protection
The glass edges are to be cleaned prior to affix. Only use glass cleaning products, free from silicones and oil (e.g. acetone)!
Single door in a niche or against wall